


Birding in Southern Africa
Time to reflect on my birding (and birding photography) experiences in southern Africa earlier this year.
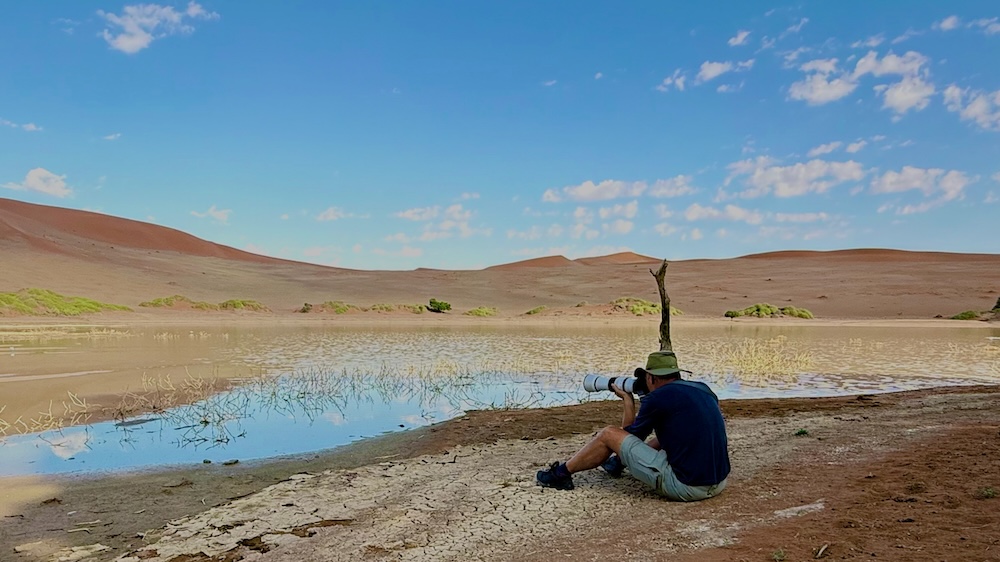 Chris shooting birds in Sossusvlei
Birding Preparation
I did a ton of preparation before this trip, especially compared to my preparation for the 2024 trip, when I reviewed photos of a dozen target birds on my iPad while flying from Newark to Johannesburg.
Step 1 was taking a birding class with EcoTraining, the same company my travel companion Ken worked with for his South African safari guide certification. The class was online and live, with recorded sessions. In a short time, we covered the gamut of bird evolution, biology, and anatomy before delving into bird identification strategies and nuances for southern Africa. Just as valuable as the class was the ongoing cohort group on WhatsApp with over 50 other students.
Step 2 came from a suggestion from instructor Richard Davis: use the South African Bird Atlas Project to make target lists for the locations I’d be visiting. Our travel range would be vast, so I enlisted Claude to help me navigate this complex exercise.
First, I needed a detailed itinerary, which I’d already built in my overlanding itinerary guide (also built with AI assist). This gave Claude the details it needed to understand where I’d be and when. I also shared my current eBird life list so it would know which birds I’d already spotted and recorded; my targets would therefore be birds I was likely to encounter but hadn’t yet recorded in eBird. The target lists would come from the detailed SABAP2 pentad data—in South Africa proper, they have logged bird sightings in a grid of 5′ × 5′ cells (roughly 9 km × 8 km), with a monthly time dimension added. We would be in Zimbabwe in September and the Western Cape in October, for example, and birds migrate. Claude crunched the data, matched it against my eBird records, and created Obsidian Markdown notes for each region. I then had my overlanding app build a routine to publish those notes to its site, giving me (and you!) quick access to my target lists. Here’s the target list for the Lebombo Eco Trail, along the east side of Kruger National Park.
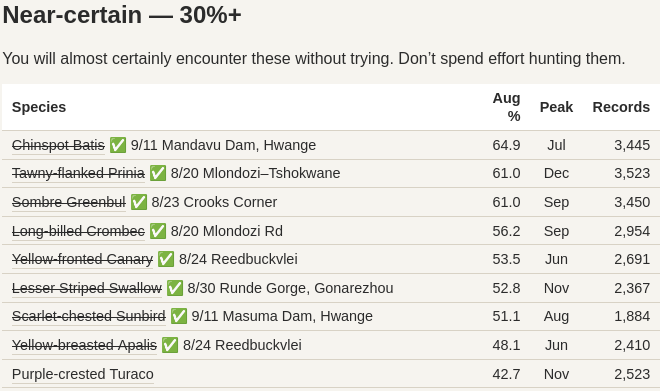 Sample target list from Lebombo, with updates
Before venturing into our next zone, I could check this list and share with Ken (and others, usually Karen) what we were looking for. This prep and visual study (along with songs and calls) helped incredibly to focus our attention and get us ready to notice. Throughout the trip I worked with Claude to make adjustments to these target lists. Two big ones that helped:
- Reconciling the different common naming taxonomies between local African names and the eBird names.
- Updating the target lists as the trip went on. We did this with strikethroughs and annotations (see image above).
Tools Used In-Country
A big disappointment in 2024 was Merlin’s inability to do sound ID for bird identification; they just haven’t harvested enough training data yet. As of 2026, things aren’t much better for Merlin, based on several tests across southern Africa.
Fortunately, during class I learned about the Sasol eBirds Southern Africa app, an offshoot of the birding book series sponsored by energy company Sasol. The eBirds app was excellent, though the UI is not as helpful as Merlin’s. The Sasol app shows a confidence level for its identification, which is helpful, but doesn’t highlight the bird it is currently hearing; this is one of my favorite features in Merlin bird ID. It was great having something to augment our visual ID process.
Ken and I both also used the Roberts bird app to supplement eBird, Merlin, and Sasol eBirds. The Roberts app is too much like a “book on an iPhone” and not nearly as usable as Merlin. The biggest gap: the geolocation works off the fairly static ranges depicted in the original books, so it will hide birds from you that are actually possible to see on the fringes of their zones. Plus, there are vagrants and early migrations that happen. I much prefer Merlin (and eBird) giving probabilistic likelihood scores, based on their own vast data store of actually recorded sightings. This was a never-ending source of amusement for Ken (primarily a Roberts user) and me: “This bird won’t be seen here.” Response: “Yes, it might.”
Bird Photography
The most important tool used (besides our binoculars) was a camera with a long lens. Having Karen with her Fuji kit and me with my Canon kit made successful identification much more likely. There are times I’m taking a photo to capture a great archival-quality shot of the species, and there are times when I’m trying to get something recorded to help us identify it (usually much later).
My custom photo asset management tool, PhotoLoupe, developed with assistance from Claude (and now ChatGPT), worked very well on the trip. I made extensive in-country enhancements and bug fixes along the way. The app has species identification (either manual by me or with AI assist) built in; for AI identification to work, photos must be properly geotagged (i.e., each photo must be assigned the latitude and longitude where it was taken, or at least an approximate location). There are tools the camera manufacturers make to help with this (including constant tethering to the phone), but I didn’t want to burn battery doing this. A nice feature I built is auto-geotagging: the app uses either a geotagged iPhone photo or the location from an eBird checklist to tag otherwise untagged photos taken within a configurable time window. The AI-driven species detection (where I send a photo plus geo data to a configurable LLM) worked well for birds as well as mammals and reptiles.
My photo gear worked great, with one big exception: the 2x extender is mostly useless for me when hand-held. I tried it two different times but thereafter it stayed in my bag. I just couldn’t get the sharpness I needed.
Two months of continually working with my camera allowed me plenty of time to sharpen my setup and work on specific skills. The single most important change I made was switching to back-button focus with two different modes: one button for precise single-point focusing (e.g., on a perched bird) and another for tracking a moving critter. This allowed me to easily start getting quality shots of birds in flight. It took about a month into the trip before I realized that those settings didn’t automatically carry over into video mode; I had to put the Canon into video mode, then go to button settings to get it set up properly. By then I had reverted to manual focus for video because it was behaving so poorly. After proper setup (and telling it to track animals and not humans), I started getting much better video footage.
Speaking of manual focus: when I had the opportunity, such as a lion lounging around or a bird comfortably perched for a long period, I used manual focus (with peaking) with the zoom feature extensively. This also served as a better proxy for binoculars. By the time we were roaming the Cape, I had great muscle memory to flip the camera into manual-focus mode and use the zoom feature to go way in on my subject. I started getting the highest-quality wildlife shots after I learned this skill.


