


A Victory Lost
I made a plea for help a couple of weeks ago - there are two wargames in my collection that have languished unplayed and I needed to make the stay or go call. Would someone please teach me Panzer Grenadier orA Victory Lost? Doug answered my call, especially kind of him given that it would be just the day after he returned from a cruise. The game would be A Victory Lost.
A Victory Lost is a classic hex-and-counter wargame with two components that were very appealing to me: headquarter-based activation and control, and randomized activations. The main appeal of this model is reduced decision space - rarely are you asked to contemplate game-wide movement and combat as your choices are generally more localized. The activation is randomized by each player having counters (chits) for each potential HQ that can be activated. Players make some choices about what the potentials are, and those chits are placed in a cup and drawn. The Soviets have a special Stavka chit that activates every HQ while the Axis have a Manstein chit that allows for the activation of any single HQ that player chooses.
Doug played the Axis while I took on the Soviets (more stuff to do and the initiative would be mine, so better for learning the game). I did minimal research on strategy, focusing primarily on choosing what HQ chits to have as potentials and where to focus my energy. My chit choices: Stavka (required), 5 TkA, 1GdA, 6A, and 3TkA. My thrust: straight up the middle.
We played only two turns (all the time we had, but plenty for me to learn the game).
Activated 1GdA for special combat phase. Managed 1 retreat. Here's a brief run-down:
First Turn
- The Soviets get one free combat HQ activation (no move, just fighting). I activated 1GdA, forcing just 1 retreat.
- My 5TkA was the first chit drawn. This is the left edge of my middle, so I made a small push left but advanced most of forces to middle.
- Lucky me, my 2GdA chit was drawn next resulting in a fortunate chained activation. This allowed me to kill off 8Lw (my first VP) and opened gap at Morozovsk.
- Doug drew 4PzA and pulled back on his right (my left), keeping panzers on the road for potential redeployment later.
- Doug drew Hollidt which again allowed him to focus on his right (no action in the north so far!). He moved the 17Pz north to try to slow down middle. He then counter attacked with 11th and 23rd PzA at Morozovsk. Step reduce and retreat 2. Will I be able to sustain my middle thrust?
- I draw Stavka! Failed attacks in the middle (including German infantry and armor that I had surrounded and may had been eliminated with the right die roll). Some success on both flanks, but clearly not what I was hoping for. I'm also a bit strung out in the middle because of my attempt to surround some units.
- 1GdA is drawn for me, allowing me to continue my middle thrust. Pushed to some rail and road lines that will limit his reinforcement options, but no combat.
- Doug draws R3A (his Romanian guard, stuck in the middle), later than he had hoped. He manages to wheel around some panzer units and cut off supply for a key panzer army.
Second Turn
- Lucky for me, Stavka first draw. Good success in the middle but still just wishful thinking. Can really use a subsequent draw to sustain my push.
- 5TkA is drawn! Sweet - surrounded the 22Pz and finished him off, picking up another 3 vp.
- R3A draw for Doug, allowing him to clean up and close off the middle hole that I was threatening.
- Kempf draw for Doug, again work in the middle.
- 2GdA for me, allowing me to close in on more armor in middle and eliminate a German infantry in south. I'm at 6 vp right now and in decent shape, probably where I should be at the end of the turn.
- Doug draws Hollidt which gives him more options in the middle. Uses it to pull back and strengthen his lines.
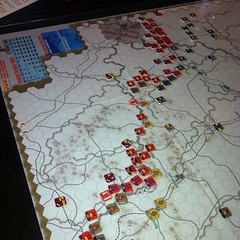
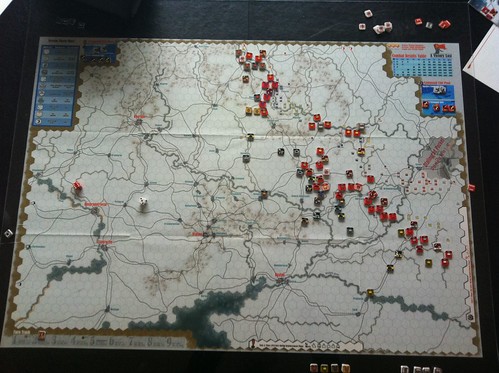
That's where we ended it. My take is that I'm probably doing better than I could have hoped on German unit eliminations (3 infantry, 1 panzer) but not as well as I should be on land grabbing. I took a picture of the final configuration -- you can see the bulge in my line in the middle with a gaping hole to the north.
As usual Doug was an adept instructor and this is clearly a game I will keep. Need to find 8 hours to set aside for a full game.