
No Retreat! The North African Front - Operation Compass
One of the significant highlights of my post-employment life (there's a difference between "post-employment" and "retired"!) is the weekly gaming that I'm doing with Doug. Every Thursday he and I are spending about eight hours together, mostly wargaming but also mixing in some lighter stuff like Marvel Dice Masters and Romance of the Nine Empires. I'm lucky to have a friend like Doug and Julie can attest to how much I look forward to Thursday each week.
Last week we took a run at No Retreat! The North African Front, again in preparation for my upcoming week-long wargaming blowout which starts tomorrow. We played Operation Compass which is both the first scenario and the start of the campaign game. Warning: this scenario is great for learning but Doug and I agree it doesn't hold water as a playable competitive game. I mean how much fun can it be to play the Italians running away with likely no hope of having any pieces left at the end?
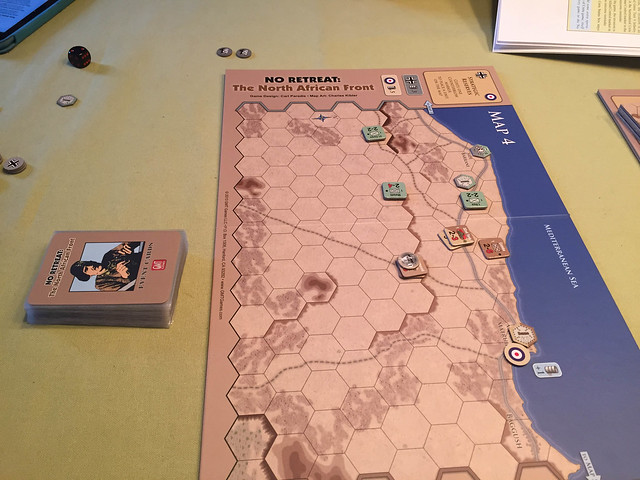
Above you can see the scenario setup at the start of the scenario and campaign. The very low counter density makes it easy to get rolling.
Let me give a brief rundown of how this game plays. On the surface it looks like any other hex-and-counter wargame, but it has some notable differences that aren't obvious until you start playing the game. Some examples:
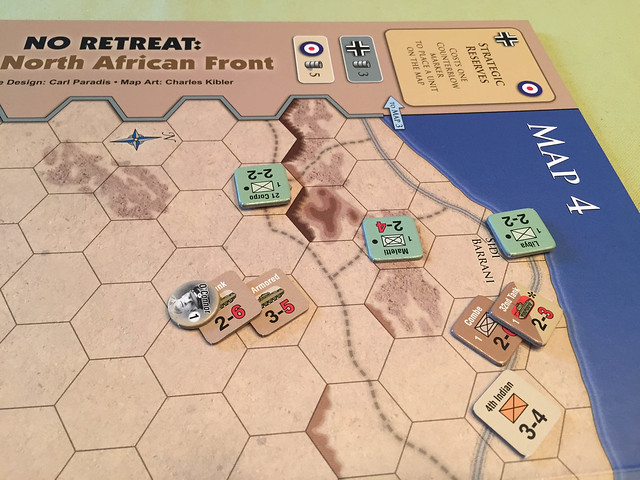
- The sequence of play and turn model is very unique (to me anyway). The easiest way to think about it is that each turn is a sequence of 1 or more sub-turns that represent an offensive on a particular contested map area. Rather than try to represent the entire North African front on a single map, the designer includes a set of mounted maps that represent different regions. So as you play through scenarios or the campaign, the flow is through a series of macro turns that happen on separate maps.
- The side that is running the offensive (and has the initiative) on a particular turn has the option after each sub-turn to continue or end the offensive. There's an economy wrapped around this: supply. So to continue these sub-turns, the initiative player needs to pay supply points for continuation. This brings urgency to the table as the supply is finite.
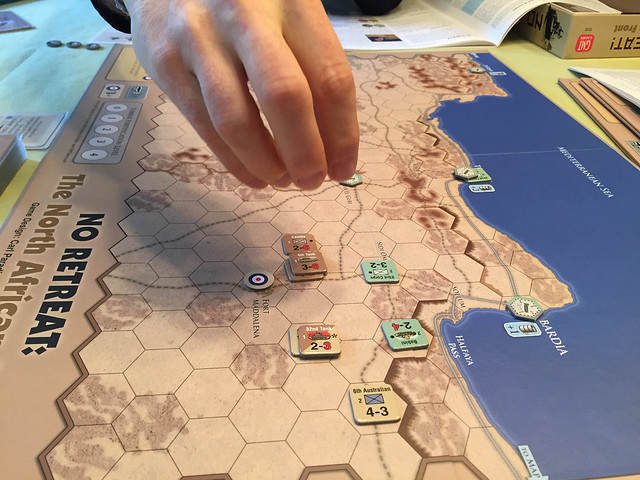
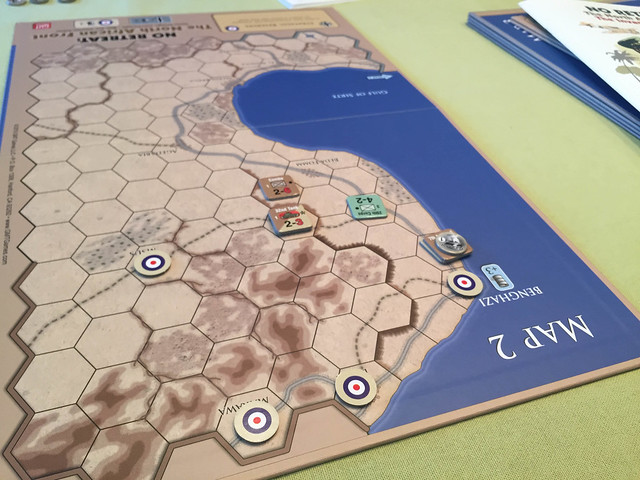
Above you can see me (as the UK) preparing to run the Italians off the first map. I paid for a continuation near the end for the sole purpose of killing off his final unit to prevent it from coming back in on the next map.
Another unique mechanism in this game is the counterblow. It is a way for the non-phasing player to force the phasing player to conduct an attack if the opportunity is there. Additionally, mechanized units of the non-phasing player that are not in an enemy zone-of-control that are under a counterblow marker can move up to two hexes. For the Brits in this scenario it means that you can prevent the Italians from just running away by creating some choke-points and looking for counterblow opportunities.
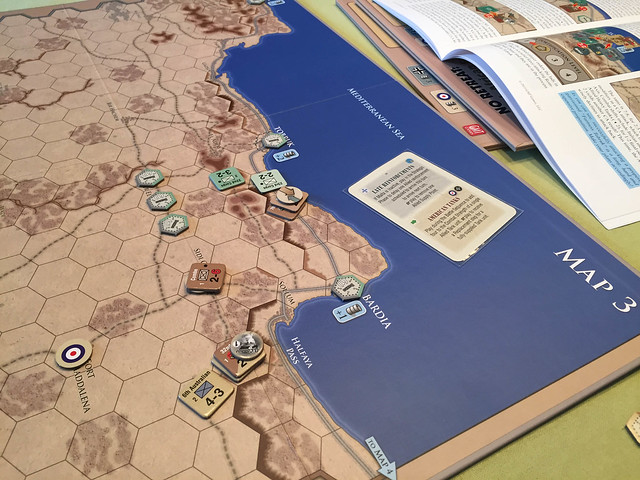
Above you can see Doug trying his best to setup a front for the Italians on Map 3. He attempted to create a some trouble for me on the inland road, but I was easily able to break through on the coast and chase him down.
There's some planning involved to pull this off. First, to even have counterblow markers you need to purchase them (they are on the flip side of the target markers that are used for attacking by the phasing player) on your own turn. These use the same supply points that you use for continuation, so planning and budgeting are important.
We also played with the extended use event cards which opened up additional opportunities. Above you can see where I played a card to allow an extra move, creating an opportunity to pretty much destroy his active forces on the map.
The deployment process when you move to a new map can be a bit confusing. The defending player sets up first and generally has the run of the board but needs to be realistic about what he can defend or run the risk of quick outflanking and losing his own supply lines. Once the defender sets up, the other player can setup as far in from his own map board as he wants, as if he has already moved through any towns along the roads as he passes in. This is what allows these initial units in their setup locations to have supply.
On the first turn on map 3 I took Sidi Omar then killed his last unit with a counterblow between Tobruk and Gazala.
We started the process of setting up Map 2, then looked at the situation and said "why bother". The Italians only had a single unit at this point and the scenario was essentially over.
Still, we got the basic mechanics down and we may just start our campaign game this week with Operation Sunflower when Rommel shows up.